Tensorflow 6가지 방법
1. tf.Module (meta class)
2. tf.keras.models.Model (multi input, output 가능)
3. tf.keras.models.Sequential
4. subclass (tf.keras.models.Model)
5. tf.estimator
6. tf.nn
Data
1. numpy
2. tensor
- tf.Tensor
- tf.data.Dataset => ML용 dataset 데이터 셋을 가장 효율적으로 관리하고 하드웨어적으로 최적화 되어 사용할 수 있는 장점이 있다
- tf.Variable
Data Pipelines
데이터의 흐름을 나타내는 것
data load -> model training
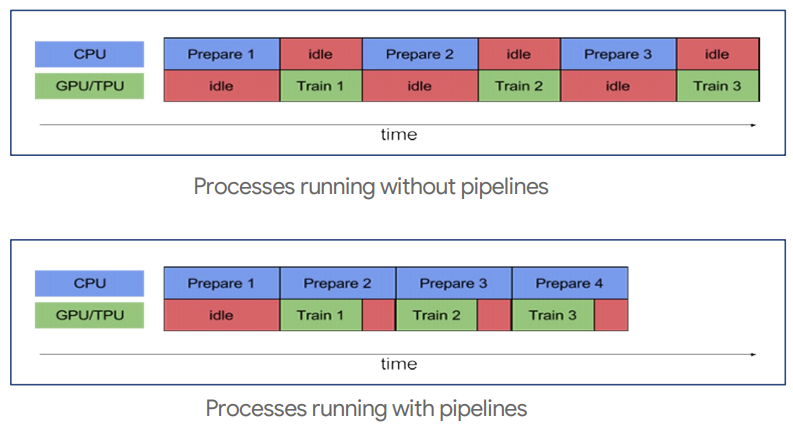
tf.data를 활용하여 data pipeline을 구축하면 하드웨어를 효율적으로 사용할 수 있다
prefetch를 통해 gpu를 사용하여 데이터 학습 중일 때 데이터 로드시간을 줄이기 위해 cpu 연산을 하여 불러온다
병렬 연산, cache또한 지원한다
import tensorflow as tf
import pandas as pd

pd.DataFrame.from_dict() # classmethod를 이용해서 dataset을 만든다

x = tf.constant([[1,2],[3,4],[5,6]])
y = tf.constant([[1],[3],[5]])

x # 요소가 두 개인 데이터 3개
# <tf.Tensor: shape=(3, 2), dtype=int32, numpy=
# array([[1, 2],
#        [3, 4],
#        [5, 6]], dtype=int32)>
xx = tf.data.Dataset.from_tensor_slices(x) # lazy 기법을 사용해서 불러온다
for i in xx.take(2):
print(i)
# tf.Tensor([1 2], shape=(2,), dtype=int32)
# tf.Tensor([3 4], shape=(2,), dtype=int32)xx = tf.data.Dataset.from_tensor_slices((x,y)) # x,y 묶음으로 관리 가능
for i, j in xx:
print(i,j)
# tf.Tensor([1 2], shape=(2,), dtype=int32) tf.Tensor([1], shape=(1,), dtype=int32)
# tf.Tensor([3 4], shape=(2,), dtype=int32) tf.Tensor([3], shape=(1,), dtype=int32)
# tf.Tensor([5 6], shape=(2,), dtype=int32) tf.Tensor([5], shape=(1,), dtype=int32)xx.cache().prefetch(32).shuffle(32)
# <ShuffleDataset shapes: ((2,), (1,)), types: (tf.int32, tf.int32)>
xx = tf.data.Dataset.from_tensors(x) # 전체 데이터
for i in xx.take(1):
print(i)
# tf.Tensor(
# [[1 2]
# [3 4]
# [5 6]], shape=(3, 2), dtype=int32)Data Augmentation
augmentation 방법 두 가지
1. 원본을 array로 바꾸고 나서 array를 augmentation
2. 원본 자체를 augmentation (이미지 파일 처리)
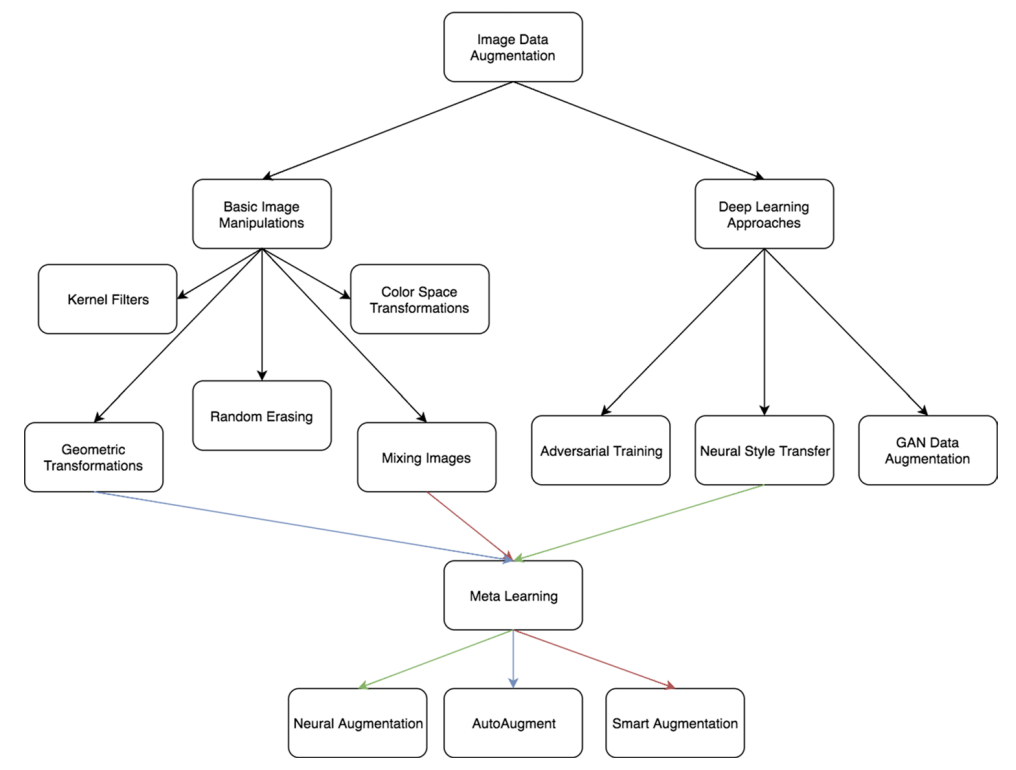
1. Basic image manipulation
- overfitting 방지하는 방식
- 원본 자체를 augmentation을 하지 않는다 (성능향상에 도움이 되는 방법이 아니다)
2. Deep learning approaches
- 원본 자체를 augmentation하는 방법
- 그럴듯한 가짜 데이터를 생성하는 방법은 일반적인 성능을 높일 수 있다
데이터 관리 방식
1. Directory
2. DB(LMDB)
- 불러오는 리소스가 크기 때문에 잘 사용하지 않는 관리 방법이다
- LMDB를 사용해서 이미지를 DB에 저장하는 방식도 있지만 요즘에는 잘 사용하지 않는다
3. HDF
데이터를 불러오는 방법
1. tf.keras.preprocessing.image_dataset_from_directory
2. tf.keras.preprocessing.image.ImageDataGenerator().flow_from_directory
3. pathlib.Path.glob
4. tf.data.Dataset.list_files
5. tf.data.Dataset.from_generator
data = tf.keras.preprocessing.image_dataset_from_directory('flower_photos/') # directory에 있는 모든 이미지를 불러온다
# Found 3670 files belonging to 5 classes.

data # tf.data.Dataset이기 때문에 map을 이용해서 전처리가 가능하다
# <BatchDataset shapes: ((None, 256, 256, 3), (None,)), types: (tf.float32, tf.int32)>

next(iter(data))
# (<tf.Tensor: shape=(32, 256, 256, 3), dtype=float32, numpy=
#  array([[[[1.64000000e+02, 1.60000000e+02, 1.48000000e+02],
#           [1.64000000e+02, 1.60000000e+02, 1.48000000e+02],
#           [1.65000000e+02, 1.61000000e+02, 1.49000000e+02],
#           ...,
#           [2.52875000e+02, 2.54250000e+02, 2.53875000e+02],
#           [2.49750000e+02, 2.50500000e+02, 2.48875000e+02],
#           [2.54250000e+02, 2.54250000e+02, 2.52250000e+02]]]],
#        dtype=float32)>, <tf.Tensor: shape=(32,), dtype=int32, numpy=
#  array([3, 1, 2, 0, 2, 2, 2, 3, 1, 1, 4, 3, 1, 1, 0, 4, 2, 1, 4, 0, 3, 1,
#         1, 2, 2, 3, 0, 0, 3, 2, 2, 0], dtype=int32)>)
idg = tf.keras.preprocessing.image.ImageDataGenerator() # augmentation을 함
data2 = idg.flow_from_directory('flower_photos/')
# Found 3670 images belonging to 5 classes.
idg.flow_from_dataframe()
next(data2)
# (array([[[[ 63., 73., 39.],
# [ 63., 73., 39.],
# [ 63., 73., 39.],
# ...,
# [166., 140., 107.],
# [160., 136., 102.],
# [157., 133., 99.]]]], dtype=float32),
# array([[1., 0., 0., 0., 0.],
# [0., 0., 0., 0., 1.],
# [1., 0., 0., 0., 0.]], dtype=float32))tf.data.Dataset.from_generator
# <function tensorflow.python.data.ops.dataset_ops.DatasetV2.from_generator>import pathlib
flower_path = pathlib.Path('flower_photos')
for i in flower_path.glob('*/*.jpg'):
print(i)
# flower_photos/dandelion/8915661673_9a1cdc3755_m.jpg
# flower_photos/dandelion/8740218495_23858355d8_n.jpg
# flower_photos/dandelion/2608937632_cfd93bc7cd.jpg
# ...
# flower_photos/tulips/8690791226_b1f015259f_n.jpg
# flower_photos/tulips/4612075317_91eefff68c_n.jpgls = tf.data.Dataset.list_files('flower_photos/*/*.jpg') # 파일 명을 불러온다
import matplotlib.pyplot as plt
for i in ls.take(100):
x = tf.keras.preprocessing.image.load_img(i.numpy())
plt.imshow(x)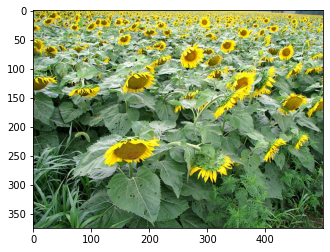
!pip install Augmentorimport Augmentor
pipe = Augmentor.Pipeline('augmentor/')
pipe.rotate(0.5,15,15)
pipe.sample(5) # 랜덤하게 n개 뽑아서 처리한다
pipe.process()
pipe.rotate(1,15,15)
pipe.flip_left_right(0.5) # 0.5확률로 좌우 반전한다
pipe.process() # 전부다 처리한다g = pipe.keras_generator(2)
tf.data.Dataset.from_generator # 내부적으로 PIL로 만들어졌다
next(g)
# (array([[[[0. , 0. , 0. ],
# [0.67058825, 0.5803922 , 0.3529412 ],
# [0.5254902 , 0.54901963, 0.34509805],
# ...,
# [0.34117648, 0.11764706, 0.08235294],
# [0.34901962, 0.12156863, 0.09411765],
# [0.35686275, 0.1254902 , 0.10980392]]]], dtype=float32),
# array([[0], [0]]))!pip install -U albumentations
!pip install -U tensorflow-datasetsimport tensorflow_datasets as tfds
flowers, info = tfds.load('tf_flowers', split='train', as_supervised=True, with_info=True)
flowers # as_supervised=False
# <PrefetchDataset shapes: {image: (None, None, 3), label: ()}, types: {image: tf.uint8, label: tf.int64}>
flowers # as_supervised=True
# <PrefetchDataset shapes: ((None, None, 3), ()), types: (tf.uint8, tf.int64)>
info
# tfds.core.DatasetInfo(
name='tf_flowers',
full_name='tf_flowers/3.0.1',
description="""
A large set of images of flowers
""",
homepage='https://www.tensorflow.org/tutorials/load_data/images',
data_path='/root/tensorflow_datasets/tf_flowers/3.0.1',
download_size=218.21 MiB,
dataset_size=221.83 MiB,
features=FeaturesDict({
'image': Image(shape=(None, None, 3), dtype=tf.uint8),
'label': ClassLabel(shape=(), dtype=tf.int64, num_classes=5),
}),
supervised_keys=('image', 'label'),
disable_shuffling=False,
splits={
'train': <SplitInfo num_examples=3670, num_shards=2>,
},
citation="""@ONLINE {tfflowers,
author = "The TensorFlow Team",
title = "Flowers",
month = "jan",
year = "2019",
url = "http://download.tensorflow.org/example_images/flower_photos.tgz" }""",
)tfds.visualization.show_examples(flowers, info)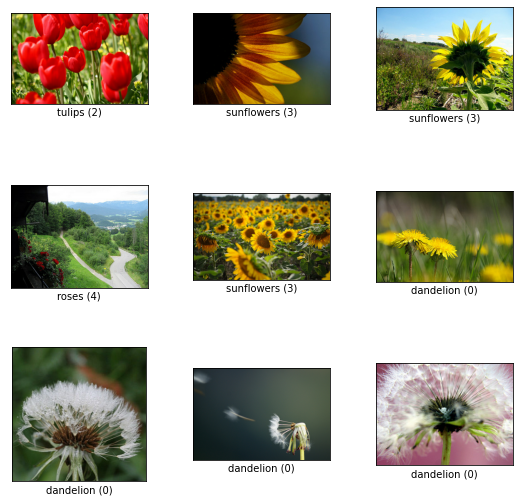
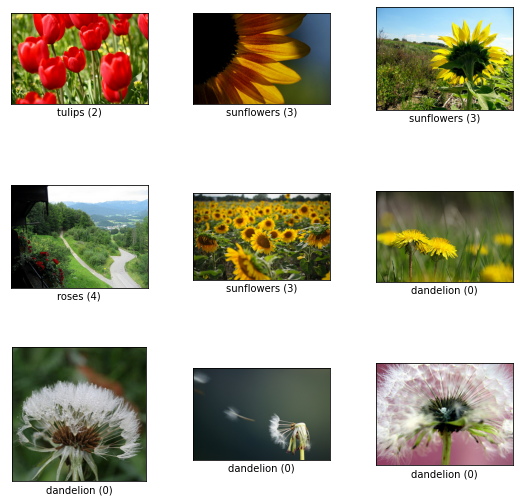
flowers_pd = tfds.as_dataframe(flowers,info) # pandas data / eda 쉽게 하기 위해
flowers_pd
data, metadata = tfds.load(
'tf_flowers',
split=['train[:80%]', 'train[80%:90%]', 'train[90%:]'],
with_info=True,
as_supervised=True
)
data
# [<PrefetchDataset shapes: ((None, None, 3), ()), types: (tf.uint8, tf.int64)>,
# <PrefetchDataset shapes: ((None, None, 3), ()), types: (tf.uint8, tf.int64)>,
# <PrefetchDataset shapes: ((None, None, 3), ()), types: (tf.uint8, tf.int64)>]metadata
# tfds.core.DatasetInfo(
name='tf_flowers',
full_name='tf_flowers/3.0.1',
description="""
A large set of images of flowers
""",
homepage='https://www.tensorflow.org/tutorials/load_data/images',
data_path='/root/tensorflow_datasets/tf_flowers/3.0.1',
download_size=218.21 MiB,
dataset_size=221.83 MiB,
features=FeaturesDict({
'image': Image(shape=(None, None, 3), dtype=tf.uint8),
'label': ClassLabel(shape=(), dtype=tf.int64, num_classes=5),
}),
supervised_keys=('image', 'label'),
disable_shuffling=False,
splits={
'train': <SplitInfo num_examples=3670, num_shards=2>,
},
citation="""@ONLINE {tfflowers,
author = "The TensorFlow Team",
title = "Flowers",
month = "jan",
year = "2019",
url = "http://download.tensorflow.org/example_images/flower_photos.tgz" }""",
)metadata.features['image']
# Image(shape=(None, None, 3), dtype=tf.uint8)
metadata.features['label']
# ClassLabel(shape=(), dtype=tf.int64, num_classes=5)
metadata.features['label'].int2str(0)
# 'dandelion'
tf.keras.layers.experimental.preprocessing.RandomCrop
tf.keras.layers.RandomCrop
# model 안에서 함께 사용 가능하다 (preprocessing layer) => map이랑 같이 쓸수 있다import numpy as np
im = tf.keras.preprocessing.image.load_img('people.jpg')
x = np.array(im)
xx = tf.keras.layers.RandomRotation(0.4)(x)
plt.imshow(xx)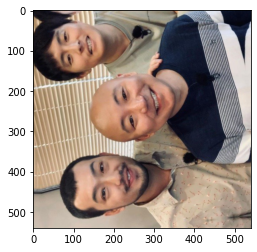
xx = tf.keras.layers.RandomFlip()(x)

plt.imshow(xx)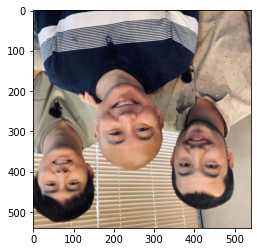
aug = tf.keras.models.Sequential([
  tf.keras.layers.RandomRotation(0.5),s
  tf.keras.layers.RandomFlip()
]) # Model보다 Sequential이 좋은 점은 다른 모델안에도 들어갈수 있다는 점이다 (전처리 레이어를 사용할 때 명확하게 확인 가능하다)

plt.imshow(aug(x))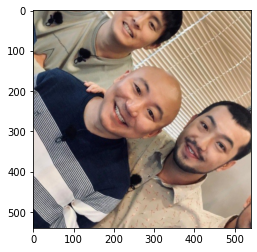
# Model안에 Sequential 전처리 Layer 포함된 예시
model = tf.keras.models.Model([
  aug,
  tf.keras.layers.Conv2D(16, 3, padding='same', activation='relu'),
  tf.keras.layers.MaxPooling2D(),
]) # 전처리 자체가 모델 안에 들어가기 때문에 gpu로 전처리가 가능하다

tf.image.random_crop # 하나씩 처리
from albumentations import Compose, RandomBrightnessContrast, HorizontalFlip
aug = Compose([RandomBrightnessContrast(), HorizontalFlip()])
aug
# Compose([
# RandomBrightnessContrast(always_apply=False, p=0.5, brightness_limit=(-0.2, 0.2), contrast_limit=(-0.2, 0.2), brightness_by_max=True),
# HorizontalFlip(always_apply=False, p=0.5),
# ], p=1.0, bbox_params=None, keypoint_params=None, additional_targets={})plt.imshow(aug(image=x)['image'])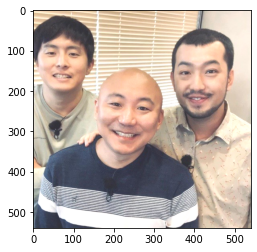
'Computer_Science > Visual Intelligence' 카테고리의 다른 글
| 24일차 - 논문 수업 (Transfer Learning) (0) | 2021.10.19 |
|---|---|
| 23일차 - 논문 수업 (Learning Technique) (0) | 2021.10.15 |
| 21일차 - 논문 수업 (CNN / Data Augmentation) (0) | 2021.10.15 |
| 20일차 - 논문 수업 (CNN) (0) | 2021.10.08 |
| 19일차 - 논문 수업 (CNN) (0) | 2021.10.08 |